Hydraulic Thumb Installation & Plumbing Kits for Excavators
- Share
- Issue Time
- May 25,2026
Summary
Shop heavy‑duty hydraulic thumb installation & plumbing kits for excavators. Durable parts, easy install, fits mini & full‑size machines.
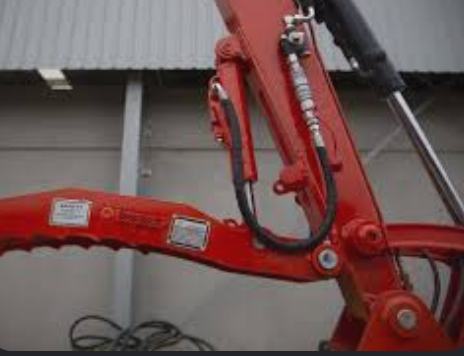
Hydraulic Thumb Installation & Plumbing Kits for Excavators
Adding a hydraulic thumb — also called a hydraulic clamp — transforms a mini-excavator or crawler excavator from a pure digging machine into a versatile material-handling tool. Whether you work in demolition, landscaping, forestry, or site prep, a properly installed hydraulic thumb lets you grip boulders, logs, debris, and pipe with precision. This guide covers thumb selection, mechanical installation, auxiliary hydraulic plumbing kits (including flat-face couplers, 45° adapters, and diverter valves), pressure setting, and global best practices for safe, leak-free operation.
1. Why Equip Your Excavator with a Hydraulic Thumb?
A hydraulic thumb pivots in sync with the bucket and is actuated by an auxiliary hydraulic circuit. Key applications worldwide include:
- Landscaping & Hardscaping: Placing decorative boulders, retaining wall blocks, and riprap.
- Demolition & Cleanup: Grabbing broken concrete, rebar, and mixed demolition debris.
- Forestry / Land Clearing: Handling tree stumps, logs, and brush piles.
- Utility & Pipe Work: Holding large-diameter pipe or manhole sections during positioning.
Compared to a mechanical (fixed / manually pinned) thumb, a hydraulic thumb offers in-cab open/close control, variable clamping force, and the ability to follow the bucket through its full curl arc — dramatically increasing productivity on mixed-material job sites.
2. Types of Hydraulic Thumb & Mounting Styles
2.1 Proportional (Hydraulic) Pin-On Thumb
The most common style for excavators equipped with a quick coupler or pin-on bucket. The thumb hinges on the same main bucket pin (or a dedicated stick pin) and the cylinder mounts to a pre-existing or welded-on base plate on the stick. The thumb tines are sized to match the bucket width and radius so they interlace with the bucket teeth.
2.2 Weld-On vs. Factory-Mount Cylinder Base
- Factory-mount: Many modern mini-excavators (CAT, Kubota, John Deere, Bobcat, Case) leave the stick with a pre-welded cylinder base plate — no welding required.
- Weld-on kit: Older machines or some compact units require tack-welding a supplied base plate to the stick. Use a 3/8" fillet weld on both sides; always ground the welder through the stick — never through the hydraulic cylinder.
2.3 Thumb Specification Checklist
- Tine thickness — AR400 or QT100 abrasion-resistant steel preferred.
- Cylinder bore/stroke — sized so thumb opens/closes through full bucket curl; rated ≥ 2,500–3,000 PSI (check machine aux pressure).
- Replaceable wear tips & greaseable pivot bushings with protected zerk fittings.
- Mechanical lock or park position for transport/storage.
3. Mechanical Installation Procedure (Step-by-Step)
- Remove the bucket main pin (or remove the quick coupler if applicable). If space is tight, fully uncurl the bucket and remove it from the machine.
- Align the thumb hinge plates with the stick/bucket pivot holes. Insert the supplied extended main pivot pin (or OEM pin if kit is designed for it) and secure with lynch pins / castle nuts & cotter keys.
- Position the cylinder base plate on the stick. For weld-on types, tack weld in the approximate position, then cycle the thumb to verify full range of motion before finishing the weld. The finished weld should be continuous 3/8" fillet on both sides.
- Mount the hydraulic cylinder to the base plate with the supplied hardened pins. Ensure grease zerks face away from the stick to avoid damage.
- Connect the cylinder rod end to the thumb's actuating link with the included hardware. Confirm the thumb opens and closes freely through the bucket's curl arc — no interference with the bucket shell, teeth, or stick.
- Grease all pivot points until fresh grease purges from bushings.
4. Hydraulic Plumbing Solutions — Why Standard Hose Routing Fails
Conventional straight hydraulic hoses routed to a thumb are prone to snapping, kinking, or being pinched by the rotating thumb and bucket assembly. A ruptured high-pressure line ejects oil at >2,000 PSI — a recognized injection-injury hazard — and causes environmental contamination plus costly downtime.
A purpose-built Excavator Hydraulic Thumb Plumbing Kit solves these problems with three critical components:
- Flat-Face (FF) Threaded Quick Couplers Leak-free connect/disconnect, resistant to impulse pressure spikes, threads lock to prevent accidental blow-off.
- 45° Angled Adapter / Swivel: Deflects hose entry away from the thumb pivot zone so hoses ride clear of moving tines and bucket linkage.
- Protective Hose Clamps & Spring Guards: Prevent abrasion against sharp edges of the stick and cylinder.
Brand-specific kits are available for Caterpillar®, Komatsu®, Hitachi®, Volvo®, Kobelco®, Kubota®, Bobcat®, John Deere®, Case®, and most global OEMs — matching port thread (SAE, BSPP, Metric) and hose length to the machine's stick.
5. Plumbing Configurations — Direct Aux vs. Diverter Valve Kit
| Configuration | Best For | Pros | Cons |
|---|---|---|---|
| Direct Double-Acting Aux Circuit (Thumb teed into existing aux lines via FF couplers) |
Machines that run thumb most of the time; rarely swap to hammer/compactor/shear. | Simplest kit; lowest cost; no extra valving. | Must disconnect thumb hoses to run other double-acting attachments; hose flex-check required. |
| Hydraulic Diverter Valve Kit (3-port or 4-port selector valve mounted on stick) |
Operators who frequently switch between thumb and another aux attachment (breaker, grapple, shear). | Toggle thumb ↔ attachment without disconnecting couplers; reduces contamination & oil loss; saves time. | Slightly higher cost; requires electrical or manual actuator & mounting space. |
5.1 Diverter Valve Operation
Mount the diverter on top of the stick above the bucket cylinder. Plumb the IN port from the machine's auxiliary pressure/return lines. Plumb one OUT port to the thumb cylinder. Plumb the second OUT port to the machine's auxiliary quick-coupler block. Rotate the handle (or activate the solenoid) to direct flow to the thumb or to the attachment circuit.
6. Hydraulic Connection & Pressure Setup
- Cap all open ports until the moment of connection to prevent ingress of dirt — even microscopic particles degrade hydraulic components.
- Connect thumb cylinder hoses using the kit's flat-face couplers. Hand-tighten, then give a 1/4 turn with a proper wrench — do not over-torque.
- Set the auxiliary relief valve pressure. Most hydraulic thumbs are designed for 2,200–2,800 PSI (150–195 bar). Exceeding the cylinder rating can bend the rod or crack the barrel; too low and clamping force is insufficient. Use a calibrated pressure gauge in the aux circuit per the machine service manual.
- Bleed air from the cylinder by slowly extending and retracting the thumb several times with the cylinder lines cracked slightly (low pressure) or by operating the circuit with the reservoir cap off — watch for steady foam-free flow.
- Final leak check: With the engine at operating temperature and the thumb fully closed against resistance (not against a solid immovable object beyond spec), inspect every fitting for weeping. Tighten to spec if needed.
7. Common Pitfalls & How to Avoid Them
- Hoses routed through the pinch zone: Always route hoses along the stick and use the 45° adapter — never let them drape across the thumb pivot.
- Aux pressure set too high: Verify thumb cylinder max working pressure (typically stamped on the barrel). Adjust the relief before first operation.